
Understanding the Kubernetes ecosystem can be challenging, especially for beginners. You need to grasp various concepts related to networking, storage, and security.
One crucial aspect of Kubernetes networking is managing external access to services within a cluster. While Kubernetes offers several options like NodePort and LoadBalancer for this purpose, this article focuses on another external traffic management solution: Ingress.
This article will explain what Kubernetes Ingress is and its benefits. You'll learn about its inner workings and get an introduction to the Kubernetes Ingress Resource and Controller. By the end, you'll understand the key aspects of Kubernetes Ingress and deploy your first Ingress Controller.
What is Kubernetes Ingress?
Kubernetes Ingress is an API object that acts as a gateway, managing external traffic to services within a Kubernetes cluster. It uses HTTP/HTTPS protocols to define routing rules that direct incoming requests to the appropriate internal services.
When an external request reaches the cluster worker nodes, Ingress intercepts it and routes the traffic to the correct internal service. From there, the service directs the request to the specific application pod.
Unlike simpler options such as NodePort or LoadBalancer services, Ingress provides advanced features including load balancing, name-based virtual hosting, and SSL termination. These capabilities make it an ideal choice for production traffic management.
Why Should You Use Kubernetes Ingress?
Kubernetes Ingress offers powerful capabilities that make it the preferred choice for managing external traffic. Here's why you should use it:
Compatibility in production environment: Production environments require essential features like TLS configuration. Ingress makes this simple—you can set up TLS for your application with just a few configuration lines.
Single point of entry for external traffic: Instead of exposing each service individually, Ingress provides a unified entry point through a domain name or IP address. This streamlines how users access your applications.
Layer 7 (L7) based routing: Ingress provides precise traffic control using Layer 7 load balancing. You can route incoming requests based on HTTP headers, URL paths, and hostnames. This granular control enables advanced strategies like A/B testing, canary deployments, and blue-green deployments.
Before Kubernetes Ingress
Before Kubernetes Ingress, developers managed external traffic through manual configurations using NodePort and LoadBalancer services.
With NodePort, services were exposed by assigning a port on each cluster node. Any traffic reaching that port would be forwarded to the corresponding service. Though simple, this approach lacked flexibility and required careful management of port allocations across the cluster.
The LoadBalancer approach used cloud providers' load balancer services. Kubernetes automated the provisioning process and configured traffic routing to the target service. While more automated than NodePort, this solution could be costly depending on the cloud provider's pricing.
Both approaches had significant limitations. They couldn't handle advanced routing requirements, SSL termination, or other features essential for modern applications. These shortcomings led to the development of Kubernetes Ingress.
Ingress introduced a more sophisticated approach to external traffic management. It allows users to define routing rules and use Ingress controllers to handle traffic, offering a comprehensive solution that addresses the limitations of earlier methods.
How Does Kubernetes Ingress Work?
Let's examine the configuration through two example files: an Ingress resource file and an internal service file.
ingress.yaml
service.yaml
The Ingress resource file (ingress.yaml) defines the routing rules for incoming traffic. It specifies both the host (in this case my-app.com) and the path and port to an internal service.
The internal service file (service.yaml) describes the service that will receive traffic from the Ingress.
When a user accesses the application through my-app.com, the domain name resolves to the Ingress controller's service IP address. The request arrives at the Ingress controller, which constantly monitors the cluster's Ingress resources.
The Ingress controller matches the request to the appropriate Ingress resource using the my-app.com host header. Following the rules in ingress.yaml, it forwards the request to the myapp-internal-service within the cluster.
The myapp-internal-service then routes the request to one of the application pods.
The pod processes the request and generates a response, which travels back through the same path: pod → service → Ingress controller → client.
In essence, Ingress acts as a smart traffic director: when a request arrives, it routes it through the internal service to the appropriate application pod.
Kubernetes Ingress Resource and Controller
The Ingress resource defines rules for routing external HTTP and HTTPS traffic to services within the cluster.
It enables you to configure how external traffic flows to different services based on hostnames, paths, or other request attributes.
Each Ingress resource includes rules, annotations and additional configuration settings for the Ingress controller, such as SSL certificate information or load balancing settings. You can see an example in the ingress.yaml file shown earlier.
Working alongside the Ingress resource is the Ingress controller, which implements the routing rules.
The controller constantly monitors the cluster for changes to Ingress resources and updates routing in real-time. It processes the Ingress resource, applies the defined rules, and handles incoming traffic routing.
Ingress controllers are third-party applications, and you can choose from several options like Nginx, Traefik, and HAProxy (each one with distinct features).
While each controller uses its own configuration syntax, the Ingress resource serves as an abstraction layer above these specifications.
This means you can use the same Ingress resource configuration regardless of which controller runs in your cluster; it will work consistently across any Kubernetes environment.
Ingress Controller Architecture
The Ingress controller operates by continuously monitoring Ingress resources within the Kubernetes cluster. When you create, update, or delete an Ingress resource, Kubernetes generates events, and the controller listens to these events to track changes in Ingress configurations.
Upon detecting changes, the controller processes the specified configurations. It analyzes these configurations to interpret routing rules and requirements, including hostnames, paths, TLS termination settings, and other routing criteria defined in the Ingress resources.
After interpreting the configurations, the controller translates this information into a format compatible with its underlying reverse proxy (such as Nginx or HAProxy). These transformed configurations are then applied to the reverse proxy.
The Ingress controller maintains a close relationship with the reverse proxy, which acts as the gateway for incoming external traffic. The controller's primary responsibility is configuring and managing the reverse proxy to ensure it follows the routing rules defined in the Ingress resources.
Through this integration, the controller dynamically updates the reverse proxy's configuration based on changes in Ingress resources, ensuring proper direction of incoming traffic to the appropriate services within the cluster.
Popular Kubernetes Ingress Controllers
Kubernetes supports deploying multiple Ingress controllers within a single cluster. Each controller can leverage different technologies and configurations to meet specific requirements.
Here are the most widely used Ingress controllers available for your Kubernetes cluster:
Nginx Ingress controller: The most popular and widely adopted controller, maintained by the Nginx project.
Istio Ingress: An Ingress controller powered by the Istio service mesh platform.
HAProxy Ingress: A controller built on HAProxy's robust load balancing technology.
Traefik Ingress: A modern controller developed by the Traefik project.
When selecting an Ingress controller, consider your specific needs, such as advanced routing capabilities, SSL termination requirements, and integration needs with other Kubernetes services.
Kubernetes officially supports more than 20 Ingress controllers. You can find the complete list here. Each controller offers unique features and capabilities, making it crucial to evaluate your requirements carefully before making a choice.
Deploy Your First Ingress Controller
Now that you understand why to use Kubernetes Ingress and how it works, let's deploy your first Ingress controller.
We'll deploy the widely used Nginx Ingress Controller. While there are several installation methods available, we'll use the manifest file approach for this tutorial.
To see other installation methods, you can visit the official Nginx Ingress Controller documentation.
Prerequisites
Before deploying the Nginx Ingress Controller, you'll need a running Kubernetes cluster. You can create one using a cloud provider like AWS, Google Cloud, or Azure, or set up a local development environment using Minikube.
Minikube Installation
If you're using Minikube, installing the Nginx Controller is simple. Just run this command:
minikube addons enable ingress
Once executed, Minikube handles the Controller configuration automatically. You'll only need to set up an Ingress resource to complete the setup.
For those using a different Kubernetes cluster, continue with the next section.
1- Get the Nginx Ingress Controller Files
First, clone the Nginx Ingress Controller repository with this command:
git clone https://github.com/nginxinc/kubernetes-ingress.git
This repository has all the necessary manifest files for deploying the Nginx Ingress Controller. After cloning, move into the repository directory.
2- Configure Namespace and Service Account
The Nginx Ingress Controller needs its own namespace. Create a new namespace and service account by running this command in the cloned directory:
kubectl apply -f deployments/common/ns-and-sa.yaml
After applying, switch to the new namespace:
kubectl config set-context —current —namespace=nginx-ingress
3- Set Up Role-Based Access Control (RBAC)
The Nginx Ingress Controller needs specific permissions to access cluster resources.
Use this command to create a cluster role and role binding for the service account:
kubectl apply -f deployments/rbac/rbac.yaml
4- Configure ConfigMap and Ingress Class
The Nginx Ingress Controller requires a ConfigMap to store its configuration settings. Create it with this command:
kubectl apply -f deployments/common/nginx-config.yaml
Then, define the Ingress class—this is required for the Nginx Controller to start:
kubectl apply -f deployments/common/ingress-class.yaml
5- Set Up Custom Resources
The Ingress pod requires custom resources to function properly. The first command below sets up a VirtualServer resource, while the other two commands set up custom resources for the NGINX App Protect WAF and DoS module.
Apply these resources using the following commands:
Step 6: Deploy the Nginx Ingress Controller
You can deploy the Controller in two ways: as a Deployment or as a DaemonSet. The Deployment method allows you to dynamically adjust the number of Controller replicas, while the DaemonSet method runs the Controller on every node in your cluster.
For this article, we'll use the Deployment method.
Run the following command to deploy the Controller:
kubectl apply -f deployments/deployment/nginx-ingress.yaml
7- Verify the Deployment
To confirm that the Nginx Ingress Controller deployed successfully, run this command:
kubectl get pods —namespace=nginx-ingress
You should see output similar to this:

When the pod shows a Running state, your Controller deployment is complete.
8- Accessing the Nginx Ingress Controller
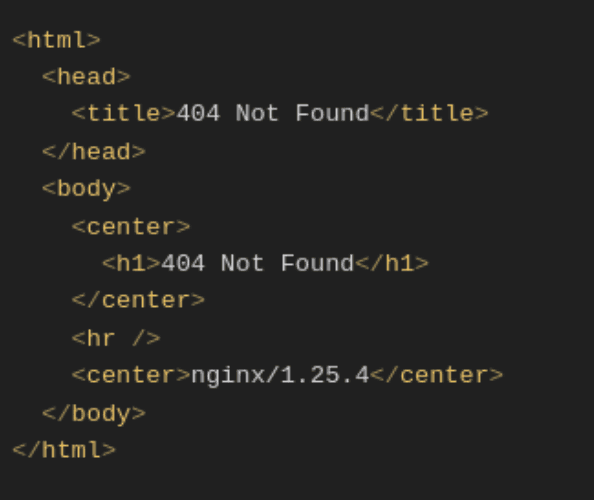
Once installed, you can access the Nginx Ingress Controller. Note that without an Ingress resource configured, Nginx will display a 404 page.
You can access the Nginx Ingress Controller through either a NodePort or LoadBalancer service.
The following command creates a NodePort service for controller access:
kubectl create -f deployments/service/nodeport.yaml
After creating the service, you can access the Nginx Ingress Controller through the NodePort service.
To access the Controller, first check which NodePort was assigned to the service by running the following command:
kubectl get svc —namespace=nginx-ingress
You should see an output similar to this:

Based on this output, HTTP traffic uses NodePort 30080, while HTTPS traffic uses NodePort 30443.
To access the Nginx Ingress Controller, use the NodePort assigned to the service.
curl http://<node-ip>:<node-port>
For HTTP traffic, you should see the following output:
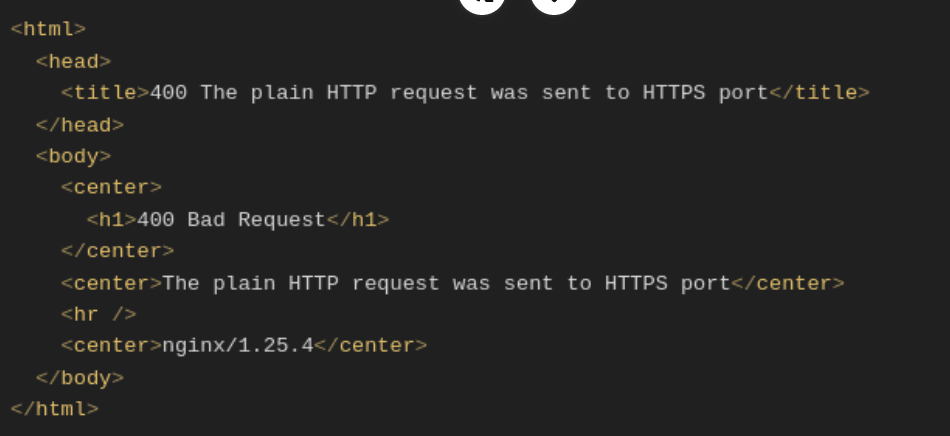
For HTTPS traffic, you should see the following output:
Routing Traffic to Multiple Paths with Ingress
One common use case for Ingress is routing traffic to multiple paths within your application.
When you have a single domain and need to route traffic to different services based on the path, Ingress provides an elegant solution.
For example, imagine an application with domain myapp.com that has multiple microservices services. Users with a myapp.com account can access both an ecommerce service and a payment service. These are separate applications sharing the same domain.
Here's how to configure an Ingress resource to route traffic to multiple paths:
In the rules section, the Ingress resource specifies the host myapp.com and defines two paths: /users and /pets. Each path connects to a different service within the cluster.
When users visit myapp.com/users, the Ingress controller routes their request to the user-service.
Likewise, requests to myapp.com/pets are directed to the pets-service.
This configuration allows you to manage multiple applications through a single Ingress resource, all sharing the same host domain.
TLS Configuration with Ingress
Production applications require HTTPS rather than HTTP for security. TLS configuration enables this secure communication, and Ingress makes it simple to implement.
Setting up TLS with Ingress only requires defining the TLS settings in your Ingress resource.
Here's how to configure TLS for the myapp.com domain:
The tls section defines both the domain (myapp.com) and the secretName that contains your TLS certificate and private key.
Before this configuration works, you'll need to create the corresponding secret in your cluster:
The secret configuration includes a name, namespace, and the base64-encoded certificate (tls.crt) and private key (tls.key).
Remember that tls.crt and tls.key should contain the actual base64-encoded certificate and key contents, not file paths.
Note: The secret must use type kubernetes.io/tls and exist in the same namespace as the Ingress resource that references it.
Conclusion
Throughout this article, we've explored the key aspects of Kubernetes Ingress, from its fundamental concepts and use cases to its practical implementation. You've learned how to deploy an Ingress Controller, configure traffic routing across multiple paths, and implement TLS security for your applications.
To solidify your understanding, practice deploying Ingress resources in your own Kubernetes cluster. Consider exploring different Ingress controllers to find the one that best matches your specific needs.
At Betta, we help teams design and operate production-grade Kubernetes environments, with Ingress strategies that prioritize security, performance, and flexibility. If you’re looking to simplify traffic management in your cluster—or ensure it’s set up the right way— we’d love to help.
" width="205px"/></svg>)


